Guide to Elite Spear Sergeants [Test Guide, base guide selfmade, asked ChatGPT to add details -> Control Read leave feedback]
Elite Spear Sergeants are Tier 4 (“4-star”) heavy infantry wielding spears and large tower shields. They are a heroic-era melee unit known for robust defenses and anti-cavalry capability. This guide provides a detailed overview of their stats, behavior, comparisons to similar units, tactical uses in various scenarios, and strategic tips for deployment.
Unit Profile and Stats Overview
Elite Spear Sergeants are classified as tower shield infantry, meaning they carry oversized shields and wear heavy armor for maximum protection. A full unit comprises 40 soldiers and typically costs 215 leadership to field. Their base health per soldier is around 7,260 (Level 1), reflecting excellent durability for a mid-tier unit. They move at a modest speed (about 5.2 movement) – slower than light troops but typical for heavy infantry.
Offensively, Spear Sergeants deal piercing damage with their spears (about 978 base piercing damage, with 1336 piercing armor penetration). This makes them effective against armored targets, especially cavalry. However, their damage output is moderate overall (they have no slashing attacks, and only minor blunt damage from bashes). They compensate with defensive strength – their heavy armor gives high resistance (e.g. ~662 piercing defense and 539 slashing defense at base level). In-game, they have the Heavy Armour trait, meaning they are “difficult to harm” due to sturdy armor. With large shields, they also boast high block strength to absorb blows and arrows. In short, this unit is built to tank damage rather than deal burst damage.
Special Traits: Elite Spear Sergeants possess several innate traits that define their role and capabilities:
- Staunch Defenders: Excellent in defense, “ideal for blocking an enemy advance.” This highlights their strength at holding chokepoints and stopping charges.
- Heavy Armour: Wears heavy armor, “making it difficult to harm.” They can absorb a lot of punishment before falling.
- Relentless: Skilled at maintaining formation and pushing through enemy lines. When advancing, they can deal heavy damage to foes in their path. (This points to their ability to keep formation cohesion during a push and crush enemies under their shield wall.)
- Fire-Resistant: Their armor is less vulnerable to fire/thermal weapons than other units of the same era. They won’t burn as easily, which helps against fire arrows, grenades, and burning oil often encountered in sieges.
- Shieldbearers: When using their shields, incoming ranged damage is reduced. In practice, this means that so long as the unit faces the enemy with shields up, arrows and bullets are significantly less effective.
Formations: Elite Spear Sergeants have access to multiple formations to adapt to battle needs:
- Shield Wall: A tightly packed, front-facing shield formation meant to withstand attacks from one direction. The unit clusters shoulder to shoulder, presenting a wall of shields toward the enemy. This is great for blocking a narrow approach or forming a defensive line.
- Turtle: An all-around defensive posture where soldiers overlap shields to the front and sides and raise them overhead. This “testudo” style formation protects the unit from front, flanks, and above – ideal when under arrow fire or surrounded by multiple angles of attack.
- Schiltron: A circular formation (shields facing outward 360°) to guard something or hold position on all sides. In schiltron, the spearmen form a ring, defending a point (or their commander) in the center. This is useful if the unit is at risk of being flanked or encircled.
Unit Orders (Abilities): Elite Spear Sergeants have two active unit orders that further define their combat behavior:
- Advance (Shielded Advance): (10 second cooldown) – The unit locks shields and advances forward in formation. While advancing, their shields cover the front, flanks, and even the top of the unit, providing superb protection from all sides. This order effectively turns the unit into a moving shield wall, allowing them to push into enemy lines or through arrow fire. Enemies directly in their path can be knocked back or damaged by the forward push (thanks to the Relentless trait, they can “deal heavy damage to enemies along the way” when advancing). Advance is crucial for breaking enemy formations or moving into a contested area under heavy fire.
- Cover Commander: (No cooldown) – The unit abandons formations and rushes to the player’s side. This is useful to quickly reposition your Spear Sergeants or to have them form up around you for protection. While Cover Commander is active, the troops cluster near the hero, but note that they won’t be in tight shield wall formation during this movement – so they are faster but more vulnerable while moving. Once by your side, they will attempt to protect you from threats (absorbing hits that might have struck you). It’s a handy command for emergency escapes or regrouping, since it has no cooldown.
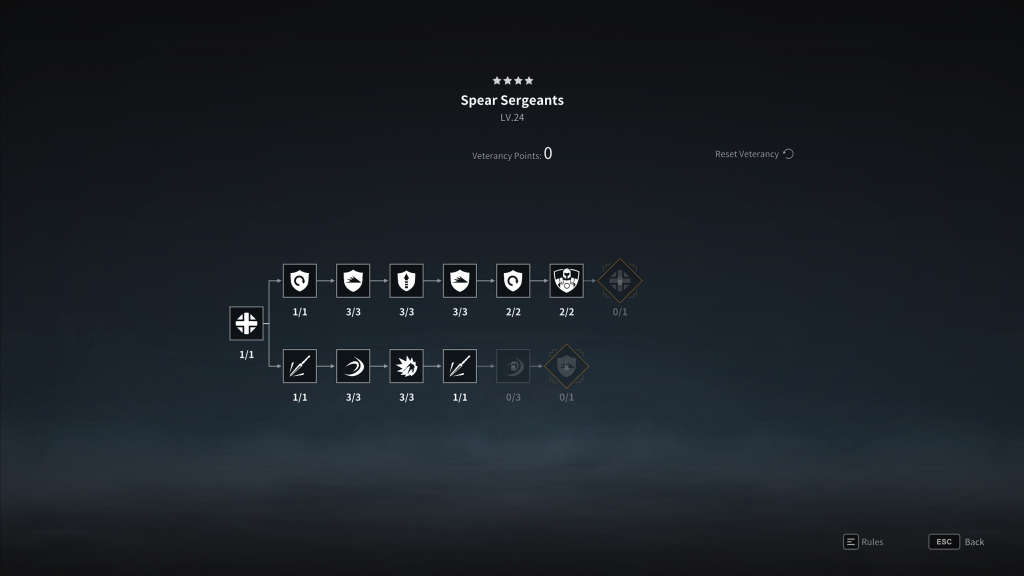
Stat Summary: In sum, Elite Spear Sergeants are a defensive spear unit with high armor and health, moderate piercing damage, and specialized in anti-infantry and holding ground. They trade raw killing power for endurance and utility. They excel when kept in formation and utilized as a shielded wall of spears. Notably, their upgrade path (Honor/Veterancy nodes) can further boost their toughness or damage. For example, one unit tree upgrade gives +15% damage versus cavalry, and another even allows their blocks to stun charging cavalry (“Heavy Spears” trait). These upgrades emphasize the unit’s natural role as cavalry-stoppers and stalwart defenders. Properly used, Elite Spear Sergeants can form a near-“unbreakable defence against enemy infantry and cavalry alike.”
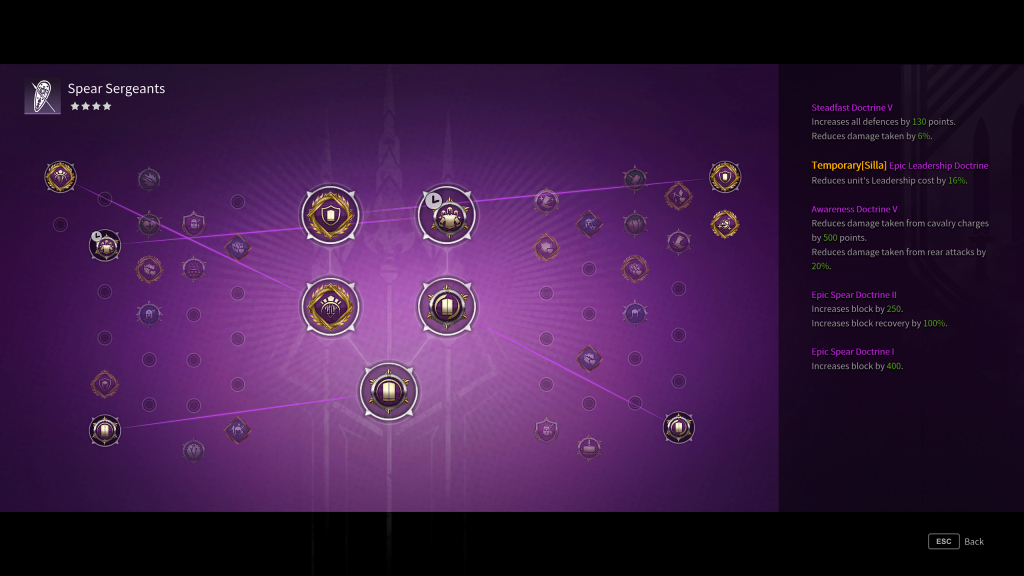
Doctrines:
Defense (Recommended) | You can also go a Damage Build as they received nice cover commander AI and Mastery.
Combat Behavior and Battlefield Role
On the battlefield, Elite Spear Sergeants behave as heavy defensive infantry. Their AI and formation make them inclined to hold positions rather than chase enemies. When ordered into a formation (Shield Wall/Turtle), they will brace tightly and attempt to tank incoming attacks. Thanks to their shields and traits, they can soak up arrows and melee hits from the front with relative ease. This makes them ideal for anchoring a line or guarding a chokepoint. The unit’s combat behavior is best described as “stand fast and hold,” with the option to “push” on command.
In practice, you should always keep Spear Sergeants in formation when fighting – this maximizes their defense. If they fight in loose formation or while moving freely, they lose much of their block coverage and will take heavier losses. As one experienced player advised, the trick is to never let them fight outside of formation, as they are far sturdier with shields locked together. In formation, they will automatically attempt to block melee attacks and projectiles coming from ahead. Their Shieldbearers trait reduces ranged damage, so they can endure enemy archers or muskets for a time when facing forward. However, like most shield units, their flanks and rear are vulnerable – if enemies get around behind them, the Sergeants’ large shields won’t help and they can be cut down quickly. Good positioning is therefore key.
Battlefield Role: Elite Spear Sergeants act primarily as a line-holding unit and damage mitigator on the battlefield. They are the quintessential shield wall: you deploy them to stop enemy advances, pin down enemies, and protect friendly units. In mass melee against infantry, Spear Sergeants won’t rack up high kills quickly, but they will hold the line, allowing damage-dealing allies (like ranged units or shock troops) to do their work. The in-game unit description aptly notes that they form a “near-unbreakable defence against enemy infantry and cavalry alike,” underscoring their role as steadfast guardians.
One of their signature moves is using the Advance ability to initiate or respond to a push. When you command Advance, the unit will slowly move forward as a block of shields. During this advance, they are highly resistant to frontal attacks and can bull through enemy footmen, often knocking them down or forcing them back. This behavior is useful to break enemy shield walls or pike lines – the Spear Sergeants literally shove into the enemy formation and make them focus your wall of sergeants. It’s also effective for marching into arrow fire: e.g. advancing down a street under archer fire, the unit remains mostly safe with shields overhead. Do note that Advance has a short cooldown and a set distance; it works best when you have a clear objective (like pushing into a group of enemies to disrupt them). The Relentless trait means “advancing can deal heavy damage to enemies along the way,” so any lighter units caught in front of an advancing shield wall may take significant damage or get trampled.
The Cover Commander ability, by contrast, is used for quick repositioning or protecting the player. When you hit Cover Commander, the Spear Sergeants will break formation and sprint to your side. This is useful if, for example, you as the hero are getting targeted and need bodyguards, or if you want to quickly pull the unit back from a bad situation. Keep in mind though: while Cover Commander is great for movement, the unit is more exposed (no tight formation) when running, so avoid sending them through heavy fire in this state. Once they reach you, you can then reform them into a Shield Wall or Turtle as needed.
In summary, the behavior of Elite Spear Sergeants is defensive and formation-centric. Treat them as a mobile barricade: they absorb damage, control enemy movements, and create space on the battlefield. They are not a flanking or chasing unit – their low speed and lower damage output see to that. Instead, use them to hold key ground and let your high-damage units or heroes do the killing. When used correctly, Spear Sergeants can effectively stall superior enemy forces. Enemies charging into a braced wall of these spearmen often come to a dead stop. Their presence on the field provides area denial – opponents will think twice about pushing cavalry or fragile units through a zone guarded by Spear Sergeants.
Comparison with Similar T4 Shield Infantry Units
Elite Spear Sergeants are one of several Tier 4 “heavy shield” infantry units. Two other notable units in this category are the Symmachean Stalwarts and the Imperial Spear Guards. All three share the role of armored spear-and-shield infantry, but there are important differences in their stats, abilities, and optimal use. Below is a comparative look at how Spear Sergeants stack up against these peers:
Symmachean Stalwarts vs. Elite Spear Sergeants
Symmachean Stalwarts are essentially an upgraded successor to Spear Sergeants – in fact, they were introduced in Season V (Legacy of Fire) as elite veterans drawn from the ranks of Spear Sergeants. Stalwarts are also a 4-star heroic-era spear unit of 32 men, but they cost slightly more leadership (240) and have a different set of capabilities. The most notable improvement is that Symmachean Stalwarts gain the ability to brace their spears, and they trade the Cover Commander skill for even stronger formation skills.
Key differences and advantages of Symmachean Stalwarts:
- Brace ability (anti-cavalry spike): Stalwarts have a “Brace” unit order that Spear Sergeants lack. When braced, the unit plants their polearms and becomes a static wall of spears ideal for stopping charges. A braced Stalwart unit can absolutely devastate a charging cavalry unit – they deal massive damage to oncoming cavalry and even to careless infantry who run into the pikes. In fact, players report that “Stalwarts in brace melt pretty much everything.” This makes them one of the best cavalry counter units in the game. Additionally, while braced, Stalwarts take 12% reduced damage and if an enemy attack is blocked by their brace, they heal 7% of their max health over 2 seconds. That self-heal on successful block greatly increases their sustain in a prolonged fight or repeated cavalry charges. Spear Sergeants, by comparison, cannot brace at all – they must rely on their normal formation block or the Advance knockback to handle cavalry, which is less lethal to the enemy. This gives Stalwarts a clear edge in anti-charge defense.
- Stronger defensive buffs: Stalwarts have unique traits that make them even tankier from the front. Their Bulwark of Faith trait means they take reduced damage from frontal attacks, and Living Martyr gives them reduced damage taken while advancing. Combined with the standard heavy armor and shield traits (which they also have), Stalwarts are extraordinarily tough when facing the enemy head-on. In practice, a Shield Wall of Stalwarts can hold longer under fire than an equivalent Spear Sergeant wall. To balance this, Stalwarts do have a Weak Spot trait: they take 10% extra damage from rear attacks. Flanking them is even more effective than flanking Sergeants (who don’t have an explicit rear vulnerability trait). So while Stalwarts are brick-strong from the front, the gap in their armor if struck from behind is a bit larger.
- Offensive potential: Interestingly, Stalwarts are considered more dangerous on the offense than Spear Sergeants in many situations. Their Advance formation is “sturdier” – when Stalwarts use their Advance order, damage from the front and sides is greatly reduced while moving, allowing them to push with less risk. They also have slightly higher base damage (e.g. ~1002 piercing vs ~978 on Sergeants) and armor penetration, though the difference is minor. The big offensive difference is the combination of their durability and brace damage. They can weather enemy hits and retaliate with high damage on braced thrusts. In siege battles or field fights, a unit of Stalwarts can push into an enemy formation and come out on top, where Spear Sergeants might falter due to lower damage and no brace. In short, Stalwarts function as enhanced shield infantry that can both hold and kill better than Spear Sergeants.
- No Cover Commander: One downside – Symmachean Stalwarts do not have the Cover Commander ability (unlike Sergeants). You cannot rapidly call them to your side or reposition them with a single click; you must manually move them or use formations. Some players lament this loss, as Cover Commander can be “invaluable” for quick reactions. However, the consensus is that the trade-off is worth it. Gaining brace and improved combat stats makes Stalwarts superior front-line troops, and you generally position them deliberately rather than needing to chase you. As one player put it, “It is REALLY worth losing the cover commander skill… Stalwarts in brace pretty much melt everything.”. So, while Spear Sergeants have a slight edge in flexibility (thanks to Cover Commander and faster movement speed of 5.2 vs Stalwart’s 4.7), Stalwarts have the edge in raw power and resilience.
In summary, Symmachean Stalwarts are often considered an upgraded variant of Elite Spear Sergeants for those who unlocked them. They perform a similar role (shielded anti-cavalry infantry) but with greater effectiveness at the cost of higher leadership (240 vs 215) and slightly less mobility. Use Stalwarts when you need a premium shield unit that can hold almost indefinitely from the front and punish enemies (especially cavalry) brutally. Spear Sergeants, on the other hand, might still be used if you value their Cover Commander or need a cheaper alternative, but generally Stalwarts outclass them in head-to-head capability.
Imperial Spear Guards vs. Elite Spear Sergeants
Imperial Spear Guards are another 4-star heavy spear unit (32 men, ~240 leadership) that serve a similar role, but with a distinct twist: they specialize even more in defensive durability and support. Imperial Spear Guards originate from the eastern empire factions in-game, and their doctrine is “the unbreachable wall guarding the great cities.” They carry massive rectangular shields and wear very heavy armor. Compared to Elite Spear Sergeants, Imperial Spear Guards sacrifice some offensive edge in exchange for being arguably the toughest shield unit and having unique support abilities.
Key features of Imperial Spear Guards:
- Superior Bulk – “Lock Shields” Passive: Imperial Spear Guards come with a unique trait called Lock Shields, which makes them incredibly tanky. While the unit’s shields are raised, damage taken is reduced by 35% across the board. This is essentially a permanent buff as long as the unit is in a guarding stance. If a Spear Guard unit is holding position in Shield Wall or Turtle, they inherently take one-third less damage than normal – a huge advantage in survivability. Additionally, the Lock Shields trait causes an automatic shield bash/repel: when an enemy approaches their formation from the front, the front-row guards will automatically lock shields and repel the enemy (knocking them back). This effect can trigger once every 20 seconds. In gameplay, this means Imperial Spear Guards can blunt an incoming melee attack or charge without even being ordered – enemies trying to engage them head-on get staggered by the shield lock. This trait makes Imperial Spear Guards excel at holding choke points; they stand there like a wall, extremely hard to break. Spear Sergeants have no equivalent passive damage reduction – they rely purely on armor stats and manual blocking. So in terms of raw durability, Imperial Spear Guards tend to last longer under focus fire or sustained melee. (Developers even noted that heavy shield infantry like ISG “need to sustain damage even better,” and at one point buffed ISG base health from ~8200 to ~8730 to reinforce this role.)
- “Wall of Nope” vs Infantry & Ranged: Much like Spear Sergeants, Imperial Spear Guards are anti-infantry by nature – with their spears and massed shields, they can stop infantry charges cold. While they don’t have a brace ability, their auto-repel and sheer heft often flips infantry or knocks them down on contact. One player describes that against most infantry charges and ranged attacks, Imperial Spear Guards “basically are a wall of ‘nope’.” Enemy infantry and arrows simply fail to make a dent in a properly formed Spear Guard unit. Spear Sergeants also do well in these situations, but ISGs do it better thanks to the higher block and the Lock Shields damage reduction. However, a caution: like all heavy infantry, Imperial Spear Guards can be vulnerable to powerful armor-piercing melee units (for example, the infamous Iron Reapers – elite axe infantry – can carve through them if they hit from the flanks or rear). The same player notes that Reapers “can basically walk over [Imperial Spear Guards] like paper” in a direct confrontation. In this regard, Spear Sergeants and Spear Guards share the weakness of heavy shields – neither will fare well against top-tier shock troops or explosives, so they require support to handle those threats.
- Utility and Support Abilities: Where Imperial Spear Guards truly distinguish themselves is in special abilities for support. They retain the Cover Commander order, but in their case it not only pulls the unit to your side, it also grants buffs: while covering the commander, the unit gains +30% damage, +15% to all defenses, and they also help protect the hero (reducing damage the hero takes from units). This means you can use ISG’s Cover Commander as a sort of phalanx escort mode, boosting their combat effectiveness when near you. It synergizes well if you as the hero plan to push with them – they’ll hit harder and endure more, effectively becoming an even sturdier wall when guarding you. Imperial Spear Guards also have an active ability called Heavy Shield Push (similar to Advance): when ordered, they form up and push forward, repelling enemies in front with their giant shields. During the push (and if holding still in formation), they are immune to crowd-control effects, so nothing can knock them down or disrupt their advance. This is great for bulldozing through stunned or weaker foes. Spear Sergeants’ Advance also repels enemies, but ISG’s version has a longer cooldown (25s) and is combined with their higher mass and CC immunity, making it very effective for breaking entrenched foes. Finally, Imperial Spear Guards have a unique Regeneration ability: they can recover 250 health per second for 15 seconds (once per minute). This heal can restore up to 3,750 health per guard, allowing them to bounce back after taking damage. Neither Spear Sergeants nor Stalwarts have a self-heal skill, so this gives ISG an edge in prolonged engagements or between waves of fighting. You can pull them back, hit Regeneration, and send them back in with a chunk of health restored.
- Stat differences: Stat-wise, Imperial Spear Guards are very close to Spear Sergeants, with small variations. Sergeants have a bit higher piercing armor penetration and damage on paper (they have slightly more “offensive” stats), whereas Imperial Guards have higher blunt damage/penetration (their shield bash is stronger). Imperial Guards are the slowest of the three units – their speed is only ~4.5, compared to 5.2 for Sergeants and 4.7 for Stalwarts. They also turn slowly (*“Sluggish” trait). So, Imperial Spear Guards definitely feel heavier and slower to maneuver. Tactically, this means Spear Sergeants might reposition a bit more easily or respond faster with Cover Commander, while ISG need more foresight for positioning (but they make up for it by being very hard to dislodge once in place).
In summary, Imperial Spear Guards function as an extremely defensive shield unit with support capabilities. Compared to Elite Spear Sergeants, they are tankier (due to 35% shield damage reduction and higher base health) and offer more utility (hero protection, self-heal), but they lack the minor offensive perks of Sergeants (no anti-cav damage bonus per se, slightly lower AP) and can’t move as quickly. Many players prefer Imperial Spear Guards when a battle plan calls for a unit that “just will not die easily” and can hold a gateway or flag indefinitely. One veteran player stated: “I absolutely adore my Imperial Spear Guards… against most cavalry charges and ranged units they basically are a wall of nope.”. If your priority is pure staying power and team support, ISG outshine Spear Sergeants. On the other hand, if you don’t have ISG unlocked or need a unit that can move a bit faster and dish a little more damage, Spear Sergeants still fulfill the role of reliable defensive infantry. It’s also worth noting that Spear Sergeants are cheaper (215 leadership vs 240), so in a warband point-constrained scenario you might field Sergeants to save leadership for other units. But in head-to-head performance, Imperial Spear Guards are often considered stronger overall in the current meta.
In conclusion, Elite Spear Sergeants occupy a middle ground among these units: they have more mobility and utility than Stalwarts (thanks to Cover Commander) and a bit more offensive potential than Imperial Guards, but they are less specialized than either. Stalwarts focus on maximum front-facing combat power (kill potential and block), Imperial Guards focus on maximum survivability and support, while Spear Sergeants are the baseline all-round shield unit. As one community member summarized the comparison: “Imperial spear guards have better bulk. The sergeants have more offensive stuff but it’s kind of wasted on them because of their defensive nature.”. This highlights that Spear Sergeants’ extra damage perks don’t translate to dramatically higher lethality, so often the tougher unit (ISG or Stalwart) is the better choice if available. Still, Spear Sergeants remain a solid unit and can perform impressively in capable hands, especially in scenarios that leverage their strengths.
Tactical Usage Scenarios
Elite Spear Sergeants can be deployed effectively in a variety of scenarios, but you’ll want to adjust your tactics depending on the context. Here we discuss how to use them in siege defense, open-field battles, and territory wars, highlighting the best approaches in each situation.
Siege Defense
On siege defense, Elite Spear Sergeants truly shine as chokepoint holders and area deniers. Their job is to make any entry point hell for the attackers. Key uses on defense include:
- Holding Gates and Breaches: Position Spear Sergeants in Shield Wall formation at a gate, breach, or ladder top. They create a “human wall” that is very hard to push through. For example, at a main gate, you can set them just behind the gate or in the gateway. When attackers try to rush in, the Sergeants’ sturdy line will block them. Their Staunch Defenders trait makes them “ideal for blocking an enemy advance,” which is exactly what you want at a breach. With their shields up, they can stall a much larger force. Use Advance proactively when you see enemies massing – advancing a few steps forward into the choke can knock foes down or push them back out, buying more time and often resulting in enemy casualties as they get staggered and cut down by your allies behind the Sergeants.
- Wall and Siege Tower Defense: If attackers put up siege ladders or a siege tower and start climbing the walls, Spear Sergeants can counter them. Set your unit to Schiltron or a tight formation on the wall near the ladder/tower landing. They will cover that sector and meet any climbing enemies with spearpoints. The circular schiltron is useful on wall tops as it defends from all sides (in case enemies come from multiple directions once up). The Sergeants’ high block and armor mean they can absorb hits from heroes and units trying to establish a footing on the wall. Essentially, they act as the “anvil” on which climbing units get stuck, allowing your damage units (like archers or artillery or friendly heroes) to then hammer the enemy. Just be mindful of trebuchets or culverins (siege artillery) that might target a clumped unit on the walls – Spear Sergeants have decent armor but can still be blown apart by heavy siege weapon hits.
- Protecting Allied Ranged Units: In siege defense, it’s common to have ranged units (archers, crossbows) shooting from behind. Spear Sergeants are excellent bodyguards for these. You can station Spear Sergeants in front of a group of Pavise crossbowmen or musketeers to soak up any returning fire or to intercept melee units that try to charge the ranged line. In Turtle formation, Spear Sergeants will present shields overhead, so even arcing arrows from attacking archers on the field will mostly bounce off. For instance, if enemies bring archer units to fire up at your walls or at your defending troops, you can move the Sergeants into turtle and have them tank those arrows while your own ranged units retaliate freely. They essentially form a shield umbrella over your vulnerable units. On the flip side, if attackers send a melee unit onto the walls (say, Berserkers or other shock troops) to kill your archers, your Spear Sergeants can intercept and hold them off, drastically reducing the damage your ranged units take.
Overall in siege defense, keep your Elite Spear Sergeants in tight formation at key defensive positions. Rotate formations as needed: Turtle when under heavy ranged fire (e.g. enemy siege towers loaded with archers shooting down at you), Shield Wall when expecting a melee push from one direction, Schiltron when you need all-round defense (like on a final base point). Use Advance to shove enemies back off ledges or through doorways. A classic tactic is, when the enemy is contesting the supply point or final flag, to advance your Spear Sergeants through the melee – this can physically push the enemy team off the point, un-contesting it. Spear Sergeants won’t get huge kill counts on defense, but they can easily be the unsung heroes by holding that breach five minutes longer than any other unit could.
Open-Field Battles
In open-field battles (such as field skirmishes, rebel camps, or open fights during territory wars outside the walls), using Spear Sergeants requires more caution, since there are no fixed fortifications to anchor them. However, they are still very useful as a security and area-control unit in the field:
- Anchoring the Line: In an open field fight, you can use Spear Sergeants to form the center or flank of your battle line. For example, in a 15v15 field battle, coordinate with allies to position your Spear Sergeants in Shield Wall at the front of your formation. They will serve as a meat shield for softer units. Your allies’ ranged units or softer melee (e.g. berserkers or pikemen) can stay right behind or within the formation, and the Sergeants will block incoming arrows and initial charges. Because they move slowly, you typically advance them methodically, securing ground bit by bit. On open ground, keep an eye on flanks – you may need to wheel the unit or reposition to ensure they face the biggest threat. If the enemy tries a frontal assault, your Spear Sergeants will hold them in place. If the enemy hesitates, your team’s ranged units can pick them apart while your Sergeants hold position.
- Pushing Objectives: Some field battles have capture points (like domination-style or supply points in territory war open field). Spear Sergeants are great for contesting these objectives. If you need to push onto an open-field capture point under arrow fire, put them in Turtle formation and advance. Their shields will mitigate ranged damage from front and above, allowing them to reach the point relatively intact. Once on the point, switch to Shield Wall or Schiltron and hold. They become a living barricade that the enemy must either commit serious resources to clear or concede the point. Be mindful of artillery – in open ground, enemy artillery or unit abilities (like mortar shots or flame rockets) might target your stationary block. If you see an incoming siege attack, you may have to move or disperse momentarily (heavy shields have high defense but are not invulnerable to repeated explosive hits).
- Supporting Flanks and Retreats: Open battles can be fluid, with flanking maneuvers. You can assign Spear Sergeants to guard a flank of your formation that’s exposed. Their presence there means the enemy can’t easily swing around that side without dealing with a wall of shields. Additionally, if your team needs to fall back or kite, Spear Sergeants can be your rear guard. Have them form up between your retreating forces and the enemy. In Turtle, they can backpedal slowly, covering the retreat while blocking arrows from pursuing foes. They excel at absorbing that kind of pressure during a fighting withdrawal.
One thing to remember in open-field use is that Spear Sergeants are vulnerable to being isolated. Avoid sending them far ahead of support – if they get surrounded in the open by faster enemy units (especially by flanking units or multiple directions at once), they will struggle. Always coordinate so that while they hold one direction, your allies cover the others, or you have terrain to protect their flanks (for example, back them up against a rock or map edge so no one can hit from behind). Used wisely, Spear Sergeants can dictate the flow of an open battle by denying avenues of attack and soaking up enemy attention.
Territory Wars
Territory Wars in Conqueror’s Blade are large-scale wars over fiefs that often involve both open-field fighting and siege scenarios with many players. Elite Spear Sergeants have a valuable place in Territory Wars as durable line infantry that can support your house/alliance in multi-stage engagements:
- Siege Assaults in Territory War: When attacking a fief (castle or city) during Territory War, you might be part of a large push to get inside. Spear Sergeants can be used much like in normal siege: to push siege equipment and to lead the charge through breaches. Often Territory War sees fierce choke-point fights at gates or walls with dozens of units clashing. Bringing Spear Sergeants to a gate push can help your team break through – for instance, have them advance with a battering ram or right after the gate falls. Their shields will absorb defender arrow fire and oil, letting more fragile units survive behind them. Once inside, they can form up to hold the courtyard or clear path for the team. A good tactic is to coordinate multiple shield units: if several allies bring shield infantry (Imperial Pike Guards, Spear Sergeants, etc.), you can stagger Advance moves to bulldoze through defending units step by step. Spear Sergeants can contribute to this “shield wall phalanx” approach effectively. Remember to utilize Turtle formation if the defenders rain fire from above – a Territory War defense might have many artillery and archers, so keeping your men protected on approach is critical.
- Siege Defense in Territory War: Conversely, if defending your fief in Territory War, Spear Sergeants are excellent for the same reasons as normal siege defense. They can be one of your unit rotations on the walls or final base. Often Territory War defenses layer multiple units on a point. Spear Sergeants could be your first line at a gate (soak the initial push), then when they’re low you retreat them and bring out another unit. Their longevity helps buy time in these high-stakes defenses. Also, Territory War battles can last a long time, and units can be healed at supply points; Spear Sergeants’ low attrition rate (if used well) means you can potentially keep them alive through multiple clashes, topping them up at the supply point in between waves of enemy assaults.
- Field Battles in Territory War (before/around the fief): Many Territory War encounters begin with open-field clashes as attackers try to reach the castle and defenders try to stop them. In these chaotic fights with potentially 30v30 or more, Spear Sergeants serve as force multipliers in the larger formation. For example, your alliance might form a battle line outside the castle – having a couple of Spear Sergeant units in the front ranks creates a sturdy core. They can block cavalry from flanking your siege engines or delay enemy infantry pushes. Also, Territory Wars often have high-level units (T5 units like Monastic Knights, Shenji Grenadiers, etc.); while Spear Sergeants are a tier below, their shield wall can still block even Tier 5 units effectively for a time. Use them to stall superior units while your team brings in counters. For instance, if the enemy sends in Reapers (a deadly T5 melee unit), your Spear Sergeants in formation can slow them down and soak their initial attacks – even though Reapers will eventually chop through, that delay could allow your ranged units to kill the Reapers or your cavalry to flank them. This kind of sacrificial hold-the-line moment can be decisive. Essentially, Spear Sergeants contribute by adding resilience and structure to large fights where without them things might dissolve into a rout.
- Resource and Supply Point Guarding: In Territory Wars, controlling the supply points outside and inside the fief is crucial. Spear Sergeants are great guards for these locations. If your team captures an outside supply camp, leaving a Spear Sergeant unit in Schiltron on it can prevent sneaky recapture by small enemy forces. They’ll form a circle and any lone hero or light unit trying to flip the point will have a hard time dislodging them quickly. Similarly, inside the fief, once you take an internal supply point, park your Sergeants there to guard it while your team pushes further. Their presence means the enemy can’t easily send a lone cavalry hero or a couple of units to ninja back the supply point.
In summary, in Territory Wars Elite Spear Sergeants are valued for their reliability and toughness in large-scale engagements. They won’t usually top the scoreboards in kills, but their contribution comes in time gained and damage mitigated for your team. In a mode where surviving that extra minute can be the difference between victory or defeat, a unit that “at least can survive the longest due to killing off some of the attackers” (as some players note of good shield units) is worth its weight in gold. Always coordinate with allies – Spear Sergeants supporting a group of friendly units amplify the whole group’s effectiveness. Avoid wandering them off alone in the massive battles where cavalry or elite units could isolate them. Stick with the main force, hold formation, and let your shields and spears do what they were meant to: defend the empire (or your chosen faction).
Strategic Strengths, Weaknesses, and Ideal Deployment
Finally, to tie everything together, let’s evaluate the strengths and weaknesses of Elite Spear Sergeants and discuss how best to deploy them for maximum impact.
Strengths:
- Exceptional Durability: With heavy armor and large shields, Spear Sergeants can absorb a lot of damage from the front. They have high defensive stats for a T4 unit and further reduce damage with traits like Shieldbearers (vs ranged). In formation, they are very hard to break. This makes them reliable for holding key positions for extended periods.
- Shield Wall Utility: They provide mobile cover for your army. In tight formation, they shield allies from arrows and other attacks. This protective utility is invaluable – e.g. covering archers or blocking a choke. They essentially act as a portable wall on the battlefield.
- Formations & Versatility: Having Shield Wall, Turtle, and Schiltron formations gives you tactical flexibility. Need to defend one direction? Use Shield Wall. Surrounded or under fire? Turtle up. Guarding a circle or static defense? Schiltron. They can adapt to different threats, making them useful in varied scenarios (sieges, field, choke points, open points).
- Low Leadership Cost (Efficiency): At roughly 215 leadership, Elite Spear Sergeants are slightly cheaper than other Tier 4 heavy infantry (many of which are 240+ leadership). This means you can include them in your warband without as much opportunity cost. They deliver great value for their leadership cost – you get a hardy unit and still have points to spend on other troops.
- Longevity and Team Support: Spear Sergeants often don’t die quickly if used properly. Even if they don’t rack up kills, surviving and holding is their own reward. This “staying power” translates to allowing your team more time to maneuver or your ranged units more time to shoot. They can also body-block and stun enemies (especially with upgrades like Heavy Spears), indirectly increasing your team’s damage and safety. As a heavy unit, they also benefit more from healing at supply points (percentage-wise) to get back into fight, which is great in prolonged battles (like Territory Wars).
Weaknesses:
- Low Mobility: Spear Sergeants are slow (speed 5.2) and have slow turn rates for a unit. They cannot chase down fleeing enemies, and they can be kited by faster units. Redeploying them to a distant flank takes time. If the battle shifts rapidly, they might lag behind. This also makes them susceptible to being outmaneuvered – a clever enemy might simply avoid your shield wall and attack elsewhere.
- Vulnerable to Flanking and Rear Attacks: Like all shield-wall units, their protection is directional. A formation of Spear Sergeants can be shredded if hit from the sides or rear. High damage units that get around them (e.g. dual-blade heroes or berserkers coming from behind) will find relatively squishy targets. This was exemplified by the Weak Spot trait given to their Stalwart cousins (who take extra rear damage) – while Spear Sergeants don’t have a formal weak-spot trait, the reality is the same: flanking them is the best way to kill them. Thus, they require support or terrain to cover their flanks.
- Limited Offensive Output: By themselves, Spear Sergeants have modest damage. They can certainly kill units (especially lighter ones or cavalry), but they are not damage-dealers like shock infantry or dedicated DPS units. Their kills usually come slowly through war of attrition. Against high-armor enemies, they might barely scratch without help. One Reddit user bluntly stated, “they can stay alive for a long time… and their damage is awful” when describing Spear Sergeants’ performance without support. While “awful” is subjective, the point is you shouldn’t expect them to wipe out enemy units quickly – that’s not their role.
- Weakness to Shock Troops and High Burst: Heavy shield units in general are countered by units with extreme burst damage or armor penetration. For Spear Sergeants, units like Iron Reapers, Modao battalion, or Nodachi heroes with Bloodlust can pose a huge threat if they get into the formation. A famous example is that Iron Reapers (elite halberd unit) will cut down Spear Sergeants easily if unchecked – as noted earlier, “Reapers can basically walk over them like paper.” Also, explosive weapons (grenades, mortars) and fire damage over time can whittle them down despite their resistance. They have some fire resistance, but a concentrated flame attack (like greek fire or multiple flame arrows) still hurts because it bypasses shields somewhat. In short, any high-tier force specifically meant to crack armor will find Spear Sergeants a prime target.
- No “Alpha Strike” or Crowd Control: Unlike some units, Spear Sergeants lack a big offensive skill to instantly swing a fight. They don’t have something like the prefecture pikes’ charge or claymores’ leaping attack. Their Advance knocks people but it’s relatively slow and pushing rather than stunning. They also don’t have a unit stun or bind (unless you unlock the stun on block). This means they rely on allies to capitalize on the gaps they create. If allies aren’t coordinating, Spear Sergeants alone might just hold but not punish the enemy enough. This reliance can be a downside in solo queue situations where teammates don’t follow up on the opportunities the shield wall provides.
Ideal Deployment:
To get the most out of Elite Spear Sergeants, deploy them in scenarios and positions that play to their strengths:
- Hold Critical Chokepoints: Deploy them to any narrow lane, gate, bridge or tunnel that you must hold. They excel in scenarios like defending a castle gate, the entrance of a city street, or a bridge between bases. Their presence all but guarantees the enemy will have to commit serious force to push through. Always face them toward the anticipated enemy approach, and tuck their flanks against walls or terrain if possible.
- Shield for Allies: Pair Spear Sergeants with high-damage, low-toughness allies. For instance, placing them in front of guns or archers on the field turns those ranged units into turret emplacements that are hard to clear. In sieges, have them guard artillery crews or support units. Deployed slightly ahead of imperial arquebusiers or grenade throwers, for example, the Spear Sergeants will eat any incoming damage while the glass-cannon units behind unleash hell. This combined-arms approach maximizes their value.
- Counter Enemy Rushes: Keep Spear Sergeants in reserve if you suspect the enemy might attempt a sudden push or flanking maneuver. The moment the enemy tries to rush a point or charge your line, bring the Sergeants in to block it. A well-timed Cover Commander followed by instant Shield Wall at the breach can completely thwart an enemy surprise attack. In Territory War, for example, if the enemy gates are about to fall, having Spear Sergeants ready to form up at the gate entrance can stop a flood of enemies from overwhelming your team’s position.
- Objective Caps and Last Stands: When you need to contest or hold a capture point and there’s no time to be fancy, throw in the Spear Sergeants. Their ability to resist and buy time is unparalleled at their tier. In a “last stand” situation (e.g. the enemy is on your final base), park the Sergeants on the point in Turtle or Schiltron and they will be the hardest unit to dislodge, giving your team precious seconds to reinforce. Likewise, if capping an enemy base, use them to form a perimeter facing outwards to block incoming defenders. They are ideal for these clutch moments when survival = victory.
- Avoid Over-Extended Positions: It’s worth noting where not to deploy them – don’t send Spear Sergeants to do tasks like chasing ranged units around open ground or flanking far around the enemy. That’s a job for cavalry or faster units. Keep Spear Sergeants where the action is thickest and most static. If they have to move too much or fight in loose formation, you’re not using their strengths. Plan their route in advance so they can march steadily, then set up formation and influence the battle from that spot.
In conclusion, Elite Spear Sergeants are a mainstay defensive unit that, when used wisely, can provide immense value to your team. Their shield wall can be the difference between holding a line or collapsing, and their mere presence forces the enemy to adapt. Use them to shape the battlefield – block what needs blocking, guard what needs guarding. They perform best in a coordinated environment where allies understand to fight around the shield wall. While they may be overshadowed in specific niches by Symmachean Stalwarts (pure frontline power) or Imperial Spear Guards (pure tankiness and support), Spear Sergeants remain a flexible and dependable unit in the right hands. Play to their strengths of defense and control, mitigate their weaknesses with good positioning and support, and these sergeants will serve as the elite bulwark of your army, living up to their reputation as “near-unbreakable” line holders.
Sources: Official Conqueror’s Blade Wiki entries for unit stats and descriptions, Conqueror’s Blade community hub and ConqHub unit databases, and player insights from the Conqueror’s Blade community (Reddit) on unit performance and comparisons.