Monastic Knights
Unit Overview
- Era/Tier: Golden Era. Heavy cavalry lancer.
- Unit Size & Leadership: 16 soldiers, leadership cost ~295
- Unlock: Unlocked via Unit Tree
- Role: Shock lance cavalry – specializes in charging and breaking infantry lines
Core Traits and Characteristics
- Chargers: “Monastic Knights” gain bonus damage while charging – each 1.5s of continuous charge adds +20% damage and speed (stacking up to 3×). Use long charges whenever possible.
- Very Heavy Armour: Extremely high defence – immune to Dazed and suffers 48% reduced damage (decaying with hits). Tough against all attacks but especially durable versus gunpowder and melee.
- Fire-Resistant: Natural resistance to incendiary and thermal attacks. Scorpions, firebombers, etc. do less damage.
- Charge Penalty vs Heroes: Charging damage against heroic heroes is 15% lower, so avoid head-on charging enemy heroes.
- Formations:
- Dispersed: Loose formation to reduce ranged damage. Use this when under missile fire.
- Wedge: A pointed formation for powerful breakthroughs. Deploy before charging into infantry.
- Line (Frontal Staggered): Two ranks for steady frontal pushes. Use after a charge to hold position.
Skills / Unit Orders
- Charge (60s cooldown): Monastic Knights launch a lance charge forward. Struck enemies are stunned, and after impact all hit targets take +30% damage. Notably, for every knight interrupted by an enemy hero during the charge, the cooldown is reduced by 6s (up to 18s). Use Charge as a one-time impact burst – follow it up quickly.
- Other Orders: (As a heavy lancer cavalry, they have no additional special orders beyond Charge.)
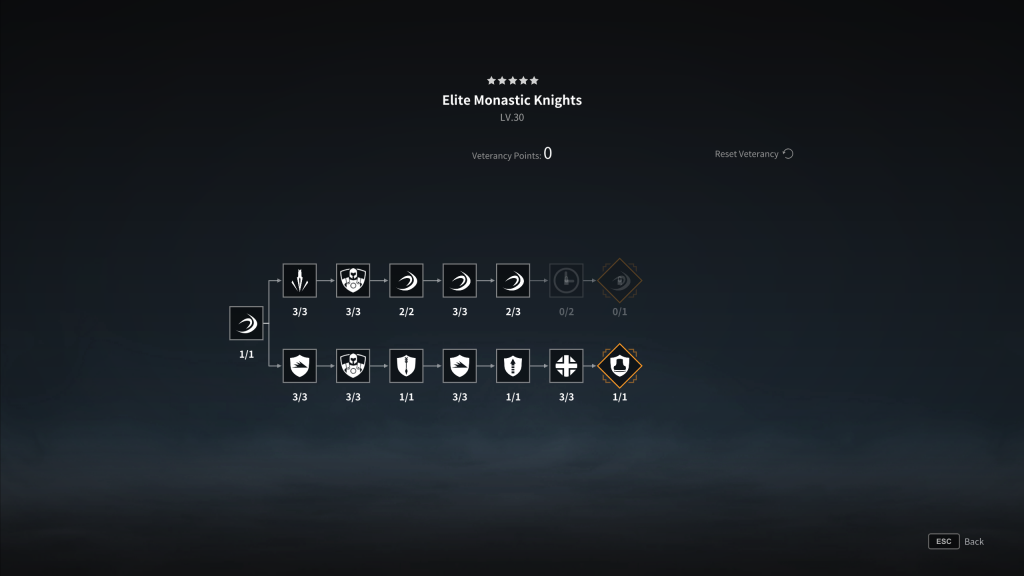
Veterancy Paths (With Tips)
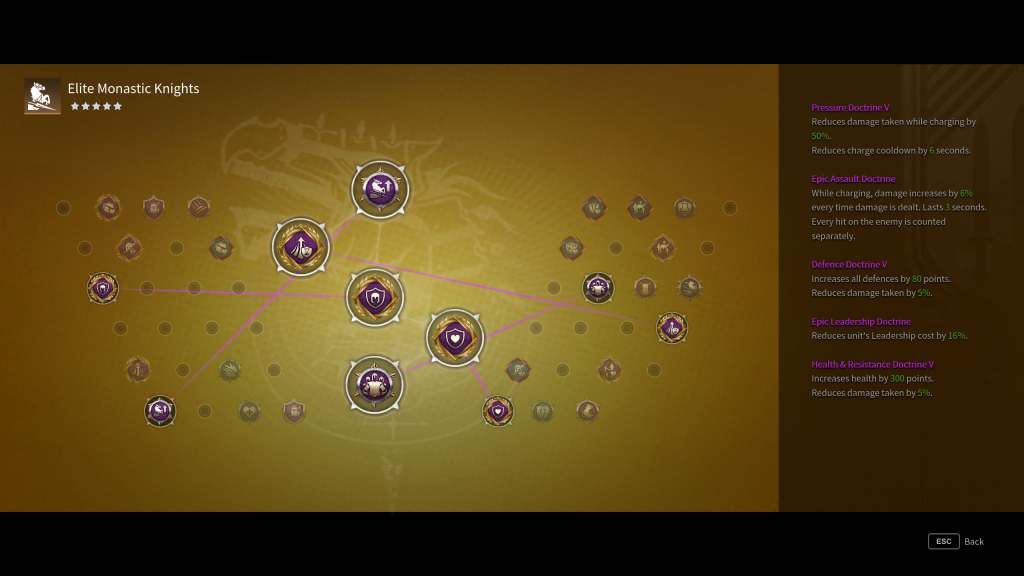
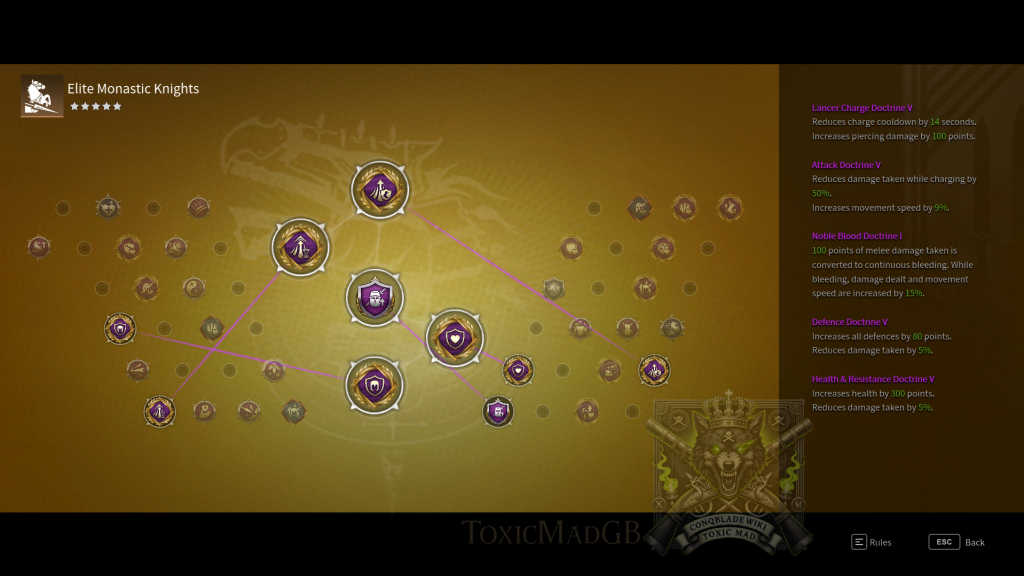
Doctrines (Recommended)

Field Micro & Combat Tactics
- Charge as Spearhead: Use Monastic Knights to lead cavalry assaults. “They should form the spearhead of any cavalry charge” – aim to smash into enemy infantry. Hold the charge to stack their “Chargers” bonus.
- Avoid Long Chases: Do not pursue light cavalry or archers deep. Monastic lack speed and excel only in straightforward charges. “Be wary of chasing after mounted archers”. Instead, charge in, inflict damage, and then redeploy.
- Use Formations Smartly: Wedge formation right before a charge to concentrate impact, then switch to Line or Dispersed after breaking through.
- Leverage Resistance: Their Fire-Resistant trait means they take much less damage from hellfire, scorpion rounds, or incendiary barrages. Exploit this by advancing under cover of allied fire or into enemy siege (e.g. scorpions).
- Combined Arms: Support them with allied ranged or infantry units. For example, use crossbowmen or archers to soften targets first, or have heavy infantry pin enemy lines while Monastics flank.
Synergies
- Cavalry Allies: Other cavalry (e.g. Chevaliers, Winged Hussars) synchronize well – alternate charges so enemy can never rest. Leadership buffs (e.g. Christine’s Charge) are very effective.
- Infantry Allies: Heavy infantry (Halberdiers, HMB, Pavise Spearmen) can hold enemy frontlines, allowing Monastics to charge in the flank.
- Hero/Command Buffs: Units that boost damage or charge amplify Monastics’ impact.
Counters
- Spearmen/Pikemen: Polearm units (e.g. Demesne Pikes, Pavise Spearmen) excel at stopping cavalry. Their long reach keeps lancers from closing effectively.
- Massed Ranged Units: Volleying crossbowmen (especially those with anti-cav abilities, like Pavise Crossbowmen) pin them down and whittle them during approach.
- Mobile Cavalry: Fast cavalry (e.g. Hussars, Imperial Arquebusiers on horseback) can kite Monastics. Heavy cavalry with longer charge (like Cataphracts) can win straight duels.
- Control Abilities: Heroes or units that stun/knock back (e.g. Tiger Fists’ crowd control) can neutralize Monastic charges.
Mastery Upgrades
Monastic Knights have no Mastery tree upgrades (mastery not implemented)
Key Takeaway
Monastic Knights are a heavy shock cavalry unit. They shine when used as the tip of the spear against infantry – a full-speed charge can break enemy lines. However, they are slow-turning and lack ranged attacks, so avoid spreading them out or chasing. Always support them (or cover their weaknesses) with allies or positioning. In essence: charge hard, break the line, then withdraw or reform.